OSINT Tool: GoogleDorker


Reading Time: 3 Minutes
GoogleDorker
GoogleDorker, developed by RevoltSecurities, is a tool tailored for bug hunters and penetration testers, enabling efficient Google Dorking. It allows users to perform advanced, targeted searches to gather critical information about their targets. By leveraging Google’s APIs, GoogleDorker simplifies comprehensive reconnaissance and enhances the effectiveness of vulnerability assessments for cybersecurity professionals.
See Also: So you want to be a hacker?
Offensive Security and Ethical Hacking Course
Features
- Asynchronous Google Dorking: Perform advanced and efficient searches using Google Dorks with high performance, powered by asynchronous processing.
- Bug Hunting and Reconnaissance: Discover valuable intelligence, potential vulnerabilities, and misconfigurations during ethical hacking and penetration testing.
- Real-Time Progress Tracking: Keep track of task progression with live updates for smooth operation.
- Cross-Platform Compatibility: Fully compatible with all major operating systems, requiring no additional dependencies.
- Customizable Search Queries: Fine-tune Google Dorks for targeted searches and precise results.
Usage
dorker -h
       __                   __
  ____/ /  ____    _____   / /__  ___    _____
 / __  /  / __ \  / ___/  / //_/ / _ \  / ___/
/ /_/ /  / /_/ / / /     / ,<   /  __/ / /
\__,_/   \____/ /_/     /_/|_|  \___/ /_/


                    - RevoltSecurities


[DESCRIPTION]: GoogleDorker - Unleash the power of Google dorking for ethical hackers with custom search precision.

[USAGE]:

    dorker [flags]

[FLAGS]:

    [INPUT]:

        -q,  --query                    :  single dorking query for Dorker to search
        -l,  --list                     :  filename that contains list of dorks with target name
        stdin/stdout                    :  Dorker now supports stdin/stdout for reading dorks

    [OUTPUT]:

        -o,   --output                  :  filename to save the outputs.

    [Rate-Limits]:

        -t,    --threads                : set the concurrency level for dorking (default 20)

    [OPTIMIZATION]:

        -t,   --timeout                 :  timeout value for every sources requests (default: 15).
        -d,   --delay                   :  specify a delay value between each requests (default: 1)

    [UPDATE]:

        -up,   --update                 :  updates Dorker tool to latest version (info: requires pip to be insalled).

    [CONFIG]:

        -px,  --proxy                   :  http proxy to use with Dorker's each request
        -cp,  --config-path             :  custom path of config file for Dorker to read api keys (default path: $HOME.config/dorker/provider-config.yaml).

    [DEBUG]:

        -h,   --help                    :  displays this help message and exits
        -s,   --silent                  :  disables showing banner and version of Dorker
        -v,   --verbose                 :  enable to increase the verbosity of the Dorker
See Also: Offensive Security Tool: HExHTTP
Installation
PIP:
pip install git+https://github.com/RevoltSecurities/GoogleDorker --break-system-packages
PIPX:
pipx install git+https://github.com/RevoltSecurities/GoogleDorker
Configuration
To configure GoogleDorker, you need to provide your Google API keys and Search Engine IDs in a configuration file. By default, the tool automatically loads the configuration file from:
$HOME/.config/dorker/provider-config.yaml
You can specify a custom configuration file path using the -cp or –config-path flag.
Configuration File Syntax
Define the API keys and Search Engine IDs in one of the following formats:
Format 1 (Inline List):
google: [
    key1:cxid,
    key2:cxid,
    key3:cxid,
    key4:cxid,
    key5:cxid
]
Format 2 (Key-Value Pairs):
google:
  - key1:cxid
  - key2:cxid
  - key3:cxid
  - key4:cxid
  - key5:cxid
Custom Path for Configuration
If you want to load a configuration file from a custom location, use the -cp or –config-path flag as shown below:
dorker -cp /path/to/your/custom-config.yaml
This flexibility allows you to manage multiple configurations for different projects or environments efficiently.
How to Get API Keys and CSE-ID? Follow These Steps:
Configuring GoogleDorker requires Google API keys and a Custom Search Engine ID (CSE-ID). Below is a step-by-step guide to obtaining and setting them up:
Step 1: Log In to Your Google Account
Ensure you’re logged into your Google account in your browser before proceeding.
Step 2: Create a Custom Search Engine
- Visit the Programmable Search Engine.
- Create a new search engine and choose the Search the entire web option, as shown below:

Step 3: Retrieve Your Custom Search Engine ID (CSE-ID)
Once your search engine is successfully created:
- Navigate to your search engine settings.
- Copy the cx value (CSE-ID).
- Add this value to your configuration YAML file under the Google-CSE-ID field, following the syntax provided.
Step 4: Generate Your Google API Key
- Go to the Google Custom Search API.
- Click on the Get Key button.
- Create a new project with any name and proceed to the next step.
Example of creating a project:

Step 5: Copy and Save Your API Key
Once the API key is generated:
- Click Show Key to reveal it.
- Copy the API key and add it to your configuration YAML file under the Google-API field.
Step 6: Generate Additional API Keys for Efficiency
To maximize dorking efficiency:
- Repeat Step 4 to generate multiple API keys (recommended: at least 10).
- Each API key allows approximately 100 queries, so having multiple keys increases your query capacity.
Example of Configuration YAML File
Below is an example of how your configuration file should look:
google:
  - key1: cxid
  - key2: cxid
  - key3: cxid
  - key4: cxid
  - key5: cxid
  - key6: cxid
  - key7: cxid
  - key8: cxid
  - key9: cxid
  - key10: cxid
Configuration Done
Once you’ve completed the configuration, you’re ready to use GoogleDorker.
Running Dorker
Pass a Single Query
To pass a single query directly via the command line, use the -q or –query flag followed by the query string.
Example:
dorker -q "site:example.com inurl:admin"
Pass a Query File
Use the -l or –list flag followed by the path to a file containing multiple queries. Each line in the file should represent a separate query.
Example:
dorker -l queries.txt
Pass Queries via stdin (Pipe Input)
You can pass queries using stdin by piping input into GoogleDorker.
Example:
echo "site:example.com inurl:admin" | dorker
For multiple queries:
echo -e "site:example.com inurl:admin\nsite:example.com inurl:login" | dorker
Summary of Flags for Query Input:
- -q, –query: Pass a single query string.
- -l, –list: Provide a file with a list of queries.
- stdin: Pipe input directly to GoogleDorker for dynamic queries.
Clone the repo from here: GitHub Link

Recent Tools
Offensive Security Tool: D0rkerR3con Framework
D0rkerR3con Framework is an offensive reconnaissance toolkit designed to identify …
Offensive Security Tool: CF GeoBypasser Cyberpunk Framework
CF GeoBypasser Cyberpunk Framework is a Modular Offensive Toolkit designed …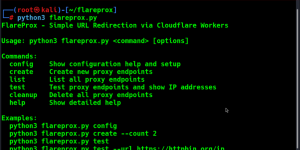
Obfuscation Tool: Flareprox
FlareProx is a tool that deploys serverless HTTP proxy endpoints …
Offensive Security Tool: FormPoison
FormPoison is a form-focused testing framework designed to identify web …

Offensive Security & Ethical Hacking Course
Begin the learning curve of hacking now!

Information Security Solutions
Find out how Pentesting Services can help you.